JUnit 4和5注释每个开发人员应该知道
JUnit 4 +5 注释摘要,附有示例
在写这篇文章之前,我只知道一些常用的JUnit 4注释,如
@RunWith
@Test
@Before
@After
@BeforeClass
@AfterClass
你不得不评论多少次测试?令我吃惊的是,有注释可以做到这一点。
@Ignore("Reason for ignoring")
@Disabled("Reason for disabling")
嗯,事实证明,还有其他一些注释,特别是在JUnit 5,可以帮助编写更好和更有效的测试。
期待什么?
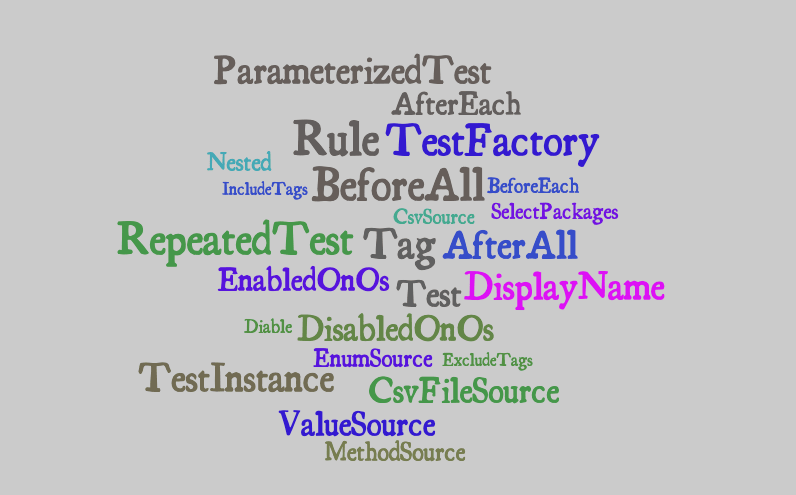
在本文中,我将用用例来涵盖以下注释。本文的目的是向您介绍注释,它不会进入每个注释的更大细节。
_本文的所有示例也可在 Github 中找到。请查看以下存储库。_
 哈米迪/朱尼特注释 - 示例
JUnit 4 和 5 注释与示例
本文的目标受众是任何级别的开发人员。
JUnit 4
以下JUnit 4注释将包括
JUnit 5
以下JUnit 5注释用示例进行解释
JUnit依赖
本文中的所有示例都使用以下 JUnit 依赖项进行测试。
testImplementation 'org.junit.jupiter:junit-jupiter-api:5.3.1'
testRuntimeOnly 'org.junit.jupiter:junit-jupiter-engine:5.3.1'
testCompileOnly 'junit:junit:4.12'
testRuntimeOnly 'org.junit.vintage:junit-vintage-engine:5.3.1'
有关详细信息,请查看 Github存储库。
JUnit注释使用
让我们用简短的使用示例逐一探索 JUnit 4 注释
单位测试的你好世界
注释用于将方法标记为测试。@Test
public class BasicJUnit4Tests {
  @Test
  public void always_passing_test() {
    assertTrue("Always true", true);
  }
}
班级级和测试级注释
注释,如和是JUnit 4类注释。@BeforeClass``````@AfterClass
public class BasicJUnit4Tests {
  @BeforeClass
  public static void setup() {
    // Setup resource needed by all tests.
  }
  @Before
  public void beforeEveryTest() {
    // This gets executed before each test.
  }
  @Test
  public void always_passing_test() {
    assertTrue("Always true", true);
  }
  @After
  public void afterEveryTest() {
    // This gets executed after every test.
  }
  @AfterClass
  public static void cleanup() {
    // Clean up resource after all are executed.
  }
}
注释为JUnit 5等价物,使用以下语句导入。@BeforeAll``````@AfterAll
// JUnit 5
import org.junit.jupiter.api.BeforeAll
import org.junit.jupiter.api.AfterAll
忽略测试与假设
测试被注释忽略,或者断言可以更改为假设,JUnit 亚军将忽略失败的假设。@Ignore
处理服务器与本地时区等场景时会使用假设。当假设失败时,抛出一个,JUnit跑步者将忽略它。AssumptionViolationException
public class BasicJUnit4Tests {
  @Ignore("Ignored because of a good reason")
  @Test
  public void test_something() {
    assertTrue("Always fails", false);
  }
}
按顺序执行测试
一般来说,编写顺序不可知单位测试是一种好的做法。
@FixMethodOrder(MethodSorters.NAME_ASCENDING)
public class FixedMethodOrderingTests {
  @Test
  public void first() {}
  @Test
  public void second() {}
  @Test
  public void third() {}
}
除了按测试名称的升序排序外,允许和级别排序。MethodSorter``````DEFAULT``````JVM
向测试添加超时
单元测试大多具有快速执行时间:但是,在某些情况下,单位测试可能需要更长的时间。
在JUnit 4中,注释接受如下参数@Test``````timeout
import org.junit.Ignore;
import org.junit.Test;
public class BasicJUnit4Tests {
  @Test(timeout = 1)
  public void timeout_test() throws InterruptedException {
    Thread.sleep(2); // Fails because it took longer than 1 second.
  }
}
在Junit 5中, 超时发生在断言级别
import static java.time.Duration.ofMillis;
import static org.junit.jupiter.api.Assertions.assertTimeout;
import org.junit.jupiter.api.Test;
public class BasicJUnit5Tests {
  @Test
  public void test_timeout() {
    // Test takes 2 ms, assertion timeout in 1 ms
    assertTimeout(ofMillis(1), () -> {
      Thread.sleep(2);
    });
  }
}
有时,在所有测试中应用超时(包括和包括超时)更有意义。@BeforeEach/Before``````@AfterEach/After
public class JUnitGlobalTimeoutRuleTests {
  @Rule
  public Timeout globalTimeout = new Timeout(2, TimeUnit.SECONDS);
  @Test
  public void timeout_test() throws InterruptedException {
    while(true); // Infinite loop
  }
  @Test
  public void timeout_test_pass() throws InterruptedException {
    Thread.sleep(1);
  }
}
使用规则与JUnit测试
我发现在编写单元测试时很有帮助。适用于以下规则@Rule
- 超时 - 上图所示
- 预期例外
- 临时折叠器
- 错误同事
- 验证
预期例外规则
此规则可用于确保测试抛出预期的异常。在Junit 4中, 我们可以做一些跟随的事情
public class BasicJUnit4Tests {
  @Test(expected = NullPointerException.class)
  public void exception_test() {
    throw new IllegalArgumentException(); // Fail. Not NPE.
  }
}
然而,在JUnit 5中,以上可以通过以下断言实现
public class BasicJUnit5Tests {
  @Test
  public void test_expected_exception() {
    Assertions.assertThrows(NumberFormatException.class, () -> {
      Integer.parseInt("One"); // Throws NumberFormatException
    });
  }
}
我们还可以在类级别中定义规则并在测试中重用
public class JUnitRuleTests {
  @Rule
  public ExpectedException thrown = ExpectedException.none();
  @Test
  public void expectedException_inMethodLevel() {
    thrown.expect(IllegalArgumentException.class);
    thrown.expectMessage("Cause of the error");
    throw new IllegalArgumentException("Cause of the error");
  }
}
临时折叠规则
本规则在测试的生命周期内为创建和删除文件夹和文件夹提供便利。
public class TemporaryFolderRuleTests {
  @Rule
  public TemporaryFolder temporaryFolder = new TemporaryFolder();
  @Test
  public void testCreatingTemporaryFileFolder() throws IOException {
    File file = temporaryFolder.newFile("testFile.txt");
    File folder = temporaryFolder.newFolder("testFolder");
    String filePath = file.getAbsolutePath();
    String folderPath = folder.getAbsolutePath();

    File testFile = new File(filePath);
    File testFolder = new File(folderPath);
    assertTrue(testFile.exists());
    assertTrue(testFolder.exists());
    assertTrue(testFolder.isDirectory());
 }
}
错误同事规则
在执行单元测试期间,如果有许多断言,而第一个断言失败,则随后的申报将跳过如下所示。
@Test
public void reportFirstFailedAssertion() {
  assertTrue(false); // Failed assertion. Report. Stop execution.
  assertFalse(true); // It's never executed.
}
如果我们能得到所有失败断言的列表并立即修复它们,而不是一个接一个地修复它们,那将是有帮助的。以下是错误合校规则如何帮助实现这一目标。
public class ErrorCollectorRuleTests {
  @Rule
  public ErrorCollector errorCollector = new ErrorCollector();

  @Test
  public void reportAllFailedAssertions() {
    errorCollector.checkThat(true, is(false));  // Fail. Continue
    errorCollector.checkThat(false, is(false)); // Pass. Continue
    errorCollector.checkThat(2, equalTo("a"));  // Fail. Report all
  }
}
还有验证器规则,我不会进入细节,你可以在这里阅读更多关于它。
有关两者的更多信息和区别,请参阅此堆叠溢出帖子。@ClassRule
JUnit套房
JUnit 套件可用于组测试类并一起执行它们。下面是一个例子
public class TestSuiteA {
  @Test
  public void testSuiteA() {}
}
public class TestSuiteB {
  @Test
  public void testSuiteB() {}
}
假设还有许多其他测试类,我们可以使用以下注释运行这两个或其中一个
@RunWith(Suite.class)
@Suite.SuiteClasses({TestSuiteA.class, TestSuiteB.class})
public class TestSuite {
  // Will run tests from TestSuiteA and TestSuiteB classes
}
以上将导致以下
JUnit 4 中的类别
在JUnit 4中,我们可以利用类别将一组测试排除在执行之外。我们可以使用下面所示的标记界面创建尽可能多的类别
没有实现的界面称为标记界面。
public interface CategoryA {}
public interface CategoryB {}
现在,我们有两个类别,我们可以用以下所示的一个或多个类别类型对每个测试进行注释
public class CategoriesTests {
  @Test
  public void test_categoryNone() {
    System.out.println("Test without any category");
    assert(false);
  }
  @Category(CategoryA.class)
  @Test
  public void test1() {
    System.out.println("Runs when category A is selected.");
    assert(true);
  }
  @Category(CategoryB.class)
  @Test
  public void test2() {
    System.out.println("Runs when category B is included.");
    assert(false);
  }
  @Category({CategoryA.class, CategoryB.class})
  @Test
  public void test3() {
    System.out.println("Runs when either of category is included.");
    assert(true);
  }
}
一个特殊的JUnit亚军称为用于执行这些测试Categories.class
@RunWith(Categories.class)
@IncludeCategory(CategoryA.class)
@ExcludeCategory(CategoryB.class)
@SuiteClasses({CategoriesTests.class})
public class CategroyTestSuite {}
以上只会运行测试,但是,如果我们删除以下条目,然后两者兼而有之执行。test1``````test1``````test3
@ExcludeCategory(CategoryB.class)
在 JUnit 5 中标记和过滤测试
除了JUnit 4中的类别外**,JUnit 5**还介绍了标记和过滤测试的能力。让我们假设我们有以下
@Tag("development")
public class UnitTests {
  @Tag("web-layer")
  public void login_controller_test() {}
  @Tag("web-layer")
  public void logout_controller_test() {}
  @Tag("db-layer")
  @Tag("dao")
  public void user_dao_tests() {}
}
和
@Tag("qa")
public class LoadTests {
  @Tag("auth")
  @Test
  public void login_test() {}
  @Tag("auth")
  @Test
  public void logout_test() {}
  @Tag("auth")
  @Test
  public void forgot_password_test() {}
  @Tag("report")
  @Test
  public void generate_monthly_report() {}
}
如上所示,标签适用于整个类以及单个方法。让我们执行在给定包中标记的所有测试。qa
@RunWith(JUnitPlatform.class)
@SelectPackages("junit.exmaples.v2.tags")
@IncludeTags("qa")
public class JUnit5TagTests {}
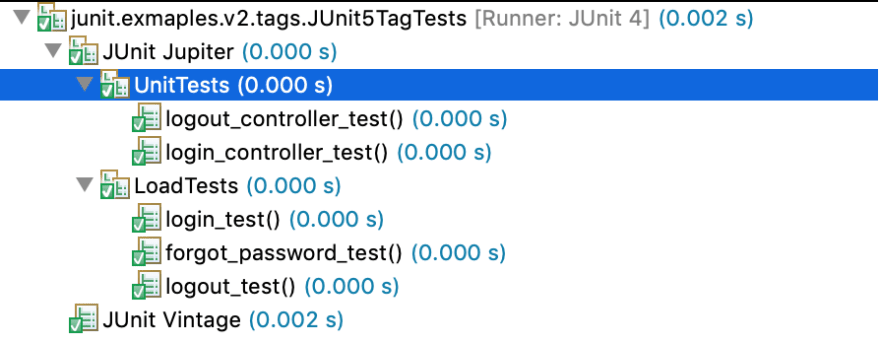
以上将导致以下输出
如上所示,仅运行带有标记的测试类。让我们同时运行和标记测试,但是,过滤和标记测试。qa``````qa``````development``````dao``````report
@RunWith(JUnitPlatform.class)
@SelectPackages("junit.exmaples.v2.tags")
@IncludeTags({"qa", "development"})
@ExcludeTags({"report", "dao"})
public class JUnit5TagTests {}
如下所示,这两个测试注释了并排除在外。dao``````report
参数化单元测试
JUnit 允许用不同的参数执行测试,而不是用不同的参数多次复制/粘贴测试或构建自定义实用方法。
@RunWith(Parameterized.class)
public class JUnit4ParametrizedAnnotationTests {
  @Parameter(value = 0)
  public int number;
  @Parameter(value = 1)
  public boolean expectedResult;
  // Must be static and return collection.
  @Parameters(name = "{0} is a Prime? {1}")
  public static Collection<Object[]> testData() {
    return Arrays.asList(new Object[][] {
      {1, false}, {2, true}, {7, true}, {12, false}
    });
  }
  @Test
  public void test_isPrime() {
    PrimeNumberUtil util = new PrimeNumberUtil();
    assertSame(util.isPrime(number), expectedResult);
  }
}
要使测试参数化,我们需要以下test_isPrime
- 利用专业的JUnit跑步者
Parametrized.class - 声明一种非私有静态方法,该方法返回带有注释的集合
@Parameters - 用和值属性申报每个参数
@Parameter - 使用测试中的注释字段
@Parameter
以下是我们参数化输出的外观test_isPrime
以上是使用注射,我们也可以实现相同的结果使用构造器,如下图所示。@Parameter
public class JUnit4ConstructorParametrized {
  private int number;
  private boolean expectedResult;

  public JUnit4ConstructorParametrized(int input, boolean result) {
    this.number = input;
    this.expectedResult = result;
  }
  ...
}
在 JUnit 5 中,引入以下来源@ParameterizedTest
- The
@ValueSource - The
@EnumSource - The
@MethodSource - 和和
@CsvSource``````@CsvFileSource
让我们详细探讨每一个。
具有价值源的参数化测试
注释允许以下声明@ValueSource
@ValueSource(strings = {"Hi", "How", "Are", "You?"})
@ValueSource(ints = {10, 20, 30})
@ValueSource(longs = {1L, 2L, 3L})
@ValueSource(doubles = {1.1, 1.2, 1.3})
让我们在测试中使用上述一个
@ParameterizedTest
@ValueSource(strings = {"Hi", "How", "Are", "You?"})
public void testStrings(String arg) {
  assertTrue(arg.length() <= 4);
}
带内源的参数化测试
注释可用于以下方式@EnumSource
@EnumSource(Level.class)
@EnumSource(value = Level.class, names = { "MEDIUM", "HIGH"})
@EnumSource(value = Level.class, mode = Mode.INCLUDE, names = { "MEDIUM", "HIGH"})
类似,我们可以以以下方式使用ValueSource``````EnumSource
@ParameterizedTest
@EnumSource(value = Level.class, mode = Mode.EXCLUDE, names = { "MEDIUM", "HIGH"})
public void testEnums_exclude_Specific(Level level) {
  assertTrue(EnumSet.of(Level.MEDIUM, Level.HIGH).contains(level));
}
带方法源的参数化测试
注释接受提供输入数据的方法名称。提供输入数据的方法可以返回单个参数,或者我们可以使用如下所示@MethodSource``````Arguments
public class JUnit5MethodArgumentParametrizedTests {
  @ParameterizedTest
  @MethodSource("someIntegers")
  public void test_MethodSource(Integer s) {
    assertTrue(s <= 3);
  }

  static Collection<Integer> someIntegers() {
    return Arrays.asList(1,2,3);
  }
}
下面是一个例子,它也可以用来返回POJOArguments
public class JUnit5MethodArgumentParametrizedTests {
  @ParameterizedTest
  @MethodSource("argumentsSource")
  public void test_MethodSource_withMoreArgs(String month, Integer number) {
    switch(number) {
      case 1: assertEquals("Jan", month); break;
      case 2: assertEquals("Feb", month); break;
      case 3: assertEquals("Mar", month); break;
      default: assertFalse(true);
    }
  }
static Collection<Arguments> argumentsSource() {
    return Arrays.asList(
      Arguments.of("Jan", 1),
      Arguments.of("Feb", 2),
      Arguments.of("Mar", 3),
      Arguments.of("Apr", 4)); // Fail.
  }
}
带 CSV 源的参数化测试
当涉及到执行带有 CSV 内容的测试时**,JUnit 5为参数化测试**提供了两种不同类型的源
- A - 逗号分离值
CsvSource - A - 引用 CSV 文件
CsvFileSource
下面是一个示例CsvSource
@ParameterizedTest
@CsvSource(delimiter=',', value= {"1,'A'","2,'B'"})
public void test_CSVSource_commaDelimited(int i, String s) {
  assertTrue(i < 3);
  assertTrue(Arrays.asList("A", "B").contains(s));
}
假设我们有以下条目在文件下sample.csv``````src/test/resources
Name, Age
Josh, 22
James, 19
Jonas, 55
案件看起来如下CsvFileSource
@ParameterizedTest
@CsvFileSource(resources = "/sample.csv", numLinesToSkip = 1, delimiter = ',', encoding = "UTF-8")
public void test_CSVFileSource(String name, Integer age) {
  assertTrue(Arrays.asList("James", "Josh").contains(name));
  assertTrue(age < 50);
}
导致 2 次成功的试运行和 1 次失败,因为最后一个条目未能通过断言。sample.csv
您还可以设计自定义转换器,将CSV转换为对象。有关详细信息,请参阅此处。
JUnit4中的理论
注释和亚军理论是实验特征。与参数化测试相比,理论将数据点的所有组合都馈送至测试,如下所示。@Theory
@RunWith(Theories.class)
public class JUnit4TheoriesTests {
  @DataPoint
  public static String java = "Java";
  @DataPoint
  public static String node = "node";
  @Theory
  public void test_theory(String a) {
    System.out.println(a);
  }
  @Theory
  public void test_theory_combos(String a, String b) {
    System.out.println(a + " - " + b);
  }
}
执行上述测试类时,测试将输出 2¹组合test_theory
Java
node
但是,该测试将输出两个数据点的所有组合。换句话说,22个组合。test_theory_combos
Java - Java
Java - node
node - Java
node - node
如果我们有以下数据点,则测试将生成 2 个*组合(2 个 args ^ 3 数据点数)。该测试将创建 33 组合。oss``````test_theory_one``````test_theory_two
@DataPoints
public static String[] oss = new String[] {"Linux", "macOS", "Windows"};
@Theory
public void test_theory_one(String a, String b) {
  System.out.println(a + " - " + b);
}
@Theory
public void test_theory_two(String a, String b, String c) {
  System.out.println(a + " <-> " + b + "<->" + c);
}
以下是有效的数据点
@DataPoints
public static Integer[] numbers() {
  return new Integer[] {1, 2, 3};
}
JUnit 5 测试显示名
JUnit 5 引入了用于给单个测试或测试类显示名称的注释,如下所示。@DisplayName
@Test
@DisplayName("Test If Given Number is Prime")
public void is_prime_number_test() {}
它会显示如下在控制台
重复JUnit测试
如果需要重复单位测试 X 次数**,JUnit 5**会提供注释。@RepeatedTest
@RepeatedTest(2)
public void test_executed_twice() {
  System.out.println("RepeatedTest"); // Prints twice
}
随之而来的是,变量以及对象。@RepeatedTest``````currentReptition``````totalRepetition``````TestInfo.java``````RepetitionInfo.java
@RepeatedTest(value = 3, name = "{displayName} executed {currentRepetition} of {totalRepetitions}")
@DisplayName("Repeated 3 Times Test")
public void repeated_three_times(TestInfo info) {
  assertTrue("display name matches",
     info.getDisplayName().contains("Repeated 3 Times Test"));
}
我们也可以用它来找出当前和总数重复。RepetitionInfo.java
使用 JUnit 5 嵌套执行内部类单元测试
我很惊讶地得知,JUnit亚军不扫描内部类的测试。
public class JUnit5NestedAnnotationTests {
  @Test
  public void test_outer_class() {
    assertTrue(true);
  }
  class JUnit5NestedAnnotationTestsNested {
    @Test
    public void test_inner_class() {
      assertFalse(true); // Never executed.
    }
  }
}
运行上述测试类时,它只会执行并报告成功,但是,当用注释标记内部类时,两个测试都会运行。test_outer_class``````@Nested
JUnit 5 测试生命周期与测试灌输注释
在调用每个方法之前,JUnit 亚军创建了该类的新实例。这种行为可以在帮助下改变@Test``````@TestInstance
@TestInstance(LifeCycle.PER_CLASS)
@TestInstance(LifeCycle.PER_METHOD)
有关更多信息,请查看文档。@TestInstance(LifeCycle.PER_CLASS)
使用 JUnit 5 测试工厂注释的动态测试
带有注释的 JUnit 测试是静态测试,因为它们在编译时间中指定。另一方面,在运行期间生成。下面是使用该类的示例。@Test``````DynamicTests``````DynamicTests``````PrimeNumberUtil
public class Junit5DynamicTests {
  @TestFactory
  Stream<DynamicTest> dynamicTests() {
    PrimeNumberUtil util = new PrimeNumberUtil();
    return IntStream.of(3, 7 , 11, 13, 15, 17)
       .mapToObj(num -> DynamicTest.dynamicTest("Is " + num + " Prime?", () -> assertTrue(util.isPrime(number))));
    }
}
有关动态测试的更多内容,请参阅此博客文章。
有条件地执行 JUnit 5 测试
JUnit 5引入了以下注释,允许有条件地执行测试。
@EnabledOnOs, @DisabledOnOs, @EnabledOnJre, @DisabledOnJre, @EnabledForJreRange, @DisabledForJreRange, @EnabledIfSystemProperty, @EnabledIfEnvironmentVariable, @DisabledIfEnvironmentVariable, @EnableIf, @DisableIf
下面是一个使用和@EnabledOnOs``````@DisabledOnOs
public class JUnit5ConditionalTests {
  @Test
  @DisabledOnOs({OS.WINDOWS, OS.OTHER})
  public void test_disabled_on_windows() {
    assertTrue(true);
  }
  @Test
  @EnabledOnOs({OS.MAC, OS.LINUX})
  public void test_enabled_on_unix() {
    assertTrue(true);
  }
  @Test
  @DisabledOnOs(OS.MAC)
  public void test_disabled_on_mac() {
    assertFalse(false);
  }
}
我使用的是MacBook,输出如下
有关其他注释的示例,请查看这些测试。
- 原文作者:知识铺
- 原文链接:https://index.zshipu.com/geek/post/java/JUnit-4%E5%92%8C5%E6%B3%A8%E9%87%8A%E6%AF%8F%E4%B8%AA%E5%BC%80%E5%8F%91%E4%BA%BA%E5%91%98%E5%BA%94%E8%AF%A5%E7%9F%A5%E9%81%93/
- 版权声明:本作品采用知识共享署名-非商业性使用-禁止演绎 4.0 国际许可协议进行许可,非商业转载请注明出处(作者,原文链接),商业转载请联系作者获得授权。
- 免责声明:本页面内容均来源于站内编辑发布,部分信息来源互联网,并不意味着本站赞同其观点或者证实其内容的真实性,如涉及版权等问题,请立即联系客服进行更改或删除,保证您的合法权益。转载请注明来源,欢迎对文章中的引用来源进行考证,欢迎指出任何有错误或不够清晰的表达。也可以邮件至 sblig@126.com


